
Pony and horse holiday door decorations have been all over Facebook and Pinterest lately, so it wasn’t surprising to me that a customer came into the garden center with this image on her phone. “Can you make one of these for me?” she asked. “I tried calling this place to order one but their Facebook page says they’re sold out and they’re not even answering their phone.”

“Of course,” I replied, with more confidence than I felt. Although the picture she brought in was of a pony made of artificial materials, she wanted one in fresh greens. I had this customer send me the image from her phone, and that night I figured out how I would make one. Other people may do these differently, but here’s the method I came up with, which worked so well I decided to share it here as The Weekend Project.
If you don’t have access to balsam brush, just clip it off of a standard, double-sided door wreath. Since the balsam brush had not come into the garden center when I made this, I used balsam clipped off a wreath, since wreaths are made of balsam tips. Decide from the start which direction you want the horse/pony to face. Since the doorknob is usually on the right, I decided to have my first attempt facing that way.
You’ll need a sheet of styrofoam, 12″ x 24″ x 2″ and some fern pins. Oasis® Greening 2″ Greening Pins – Box of 450

I downloaded an outline of a horse head from the internet. (Google “silhouette of horse head” or something similar.) I printed it out on a standard 8 1/2 by 11 paper. Then I had to enlarge it because I wanted the finished piece to be bigger. So I used the grid method of enlarging the outline while keeping it in proportions. I divided the paper into a grid, each square being 2 1/8 inches high and wide.
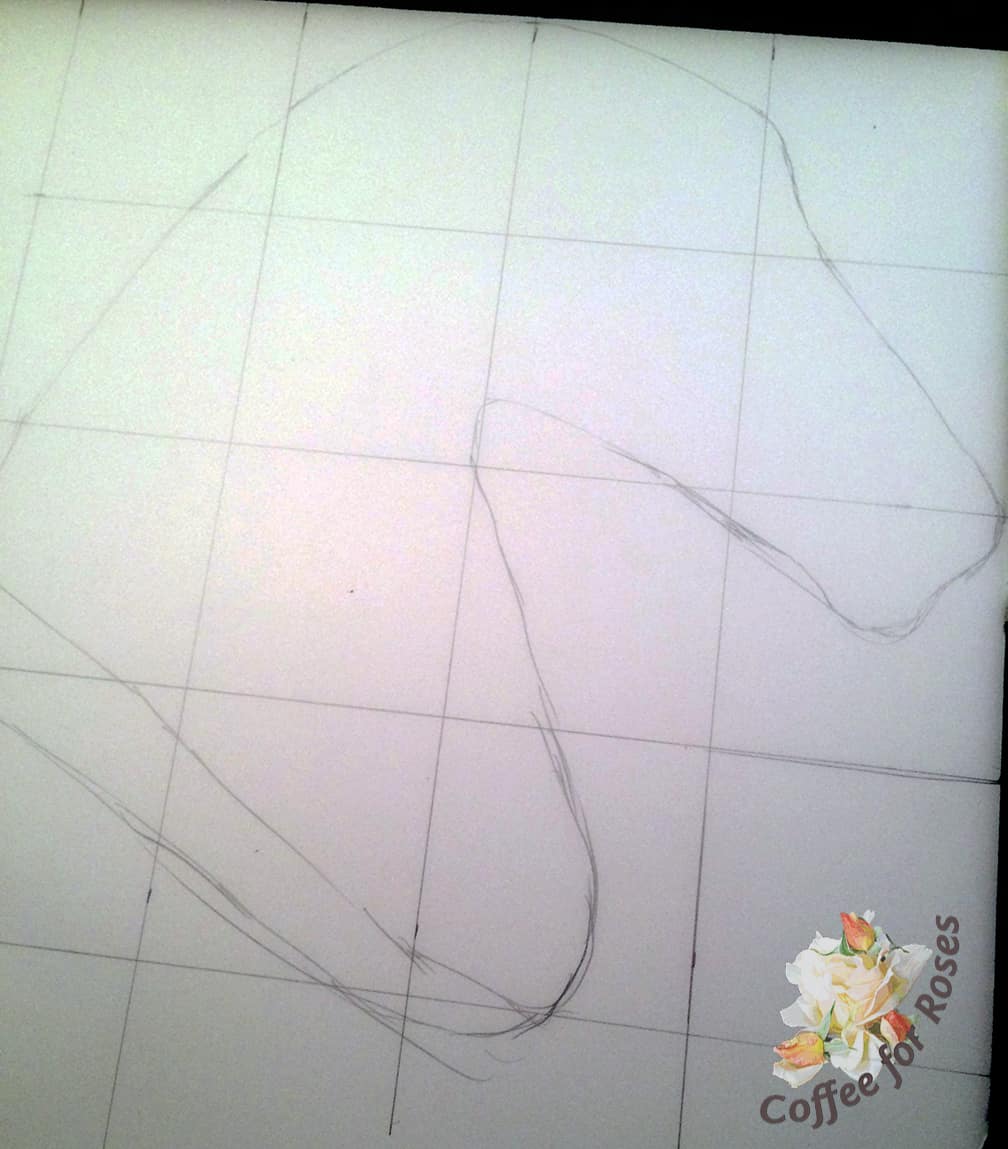
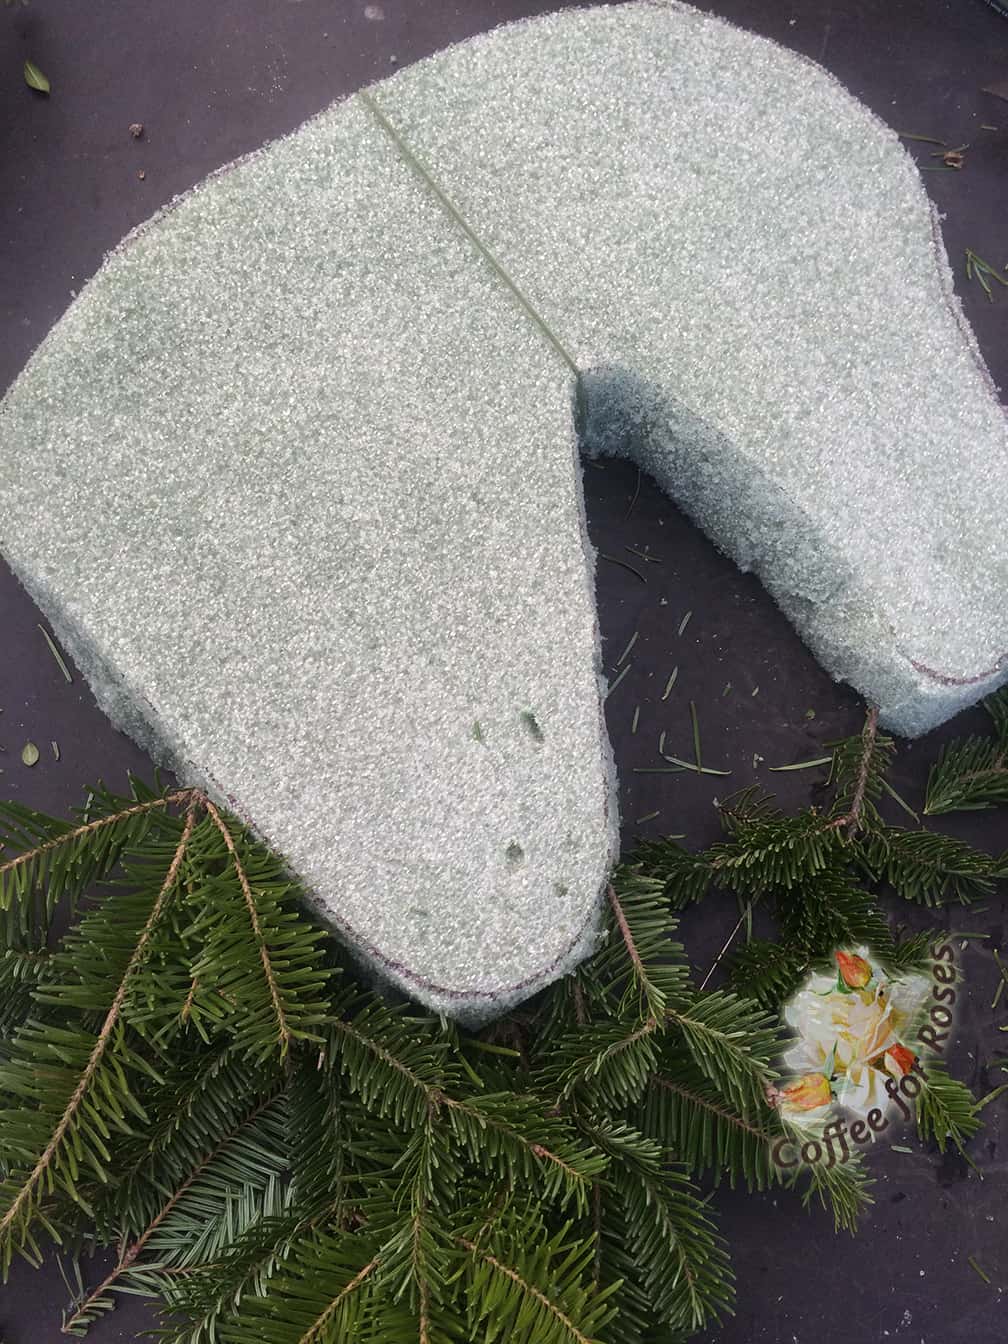
Then I marked out a 14″ square on a piece of foam core board, making each square 3 1/2 inches high and wide. Looking from the smaller paper to the larger board, I drew the line of the horse’s silhouette. I didn’t draw the shaggy mane because I knew that this would be made of the white pine. I also knew that I needed to keep the form a bit thinner than the finished wreath would be since the greens would stick out from all the edges.
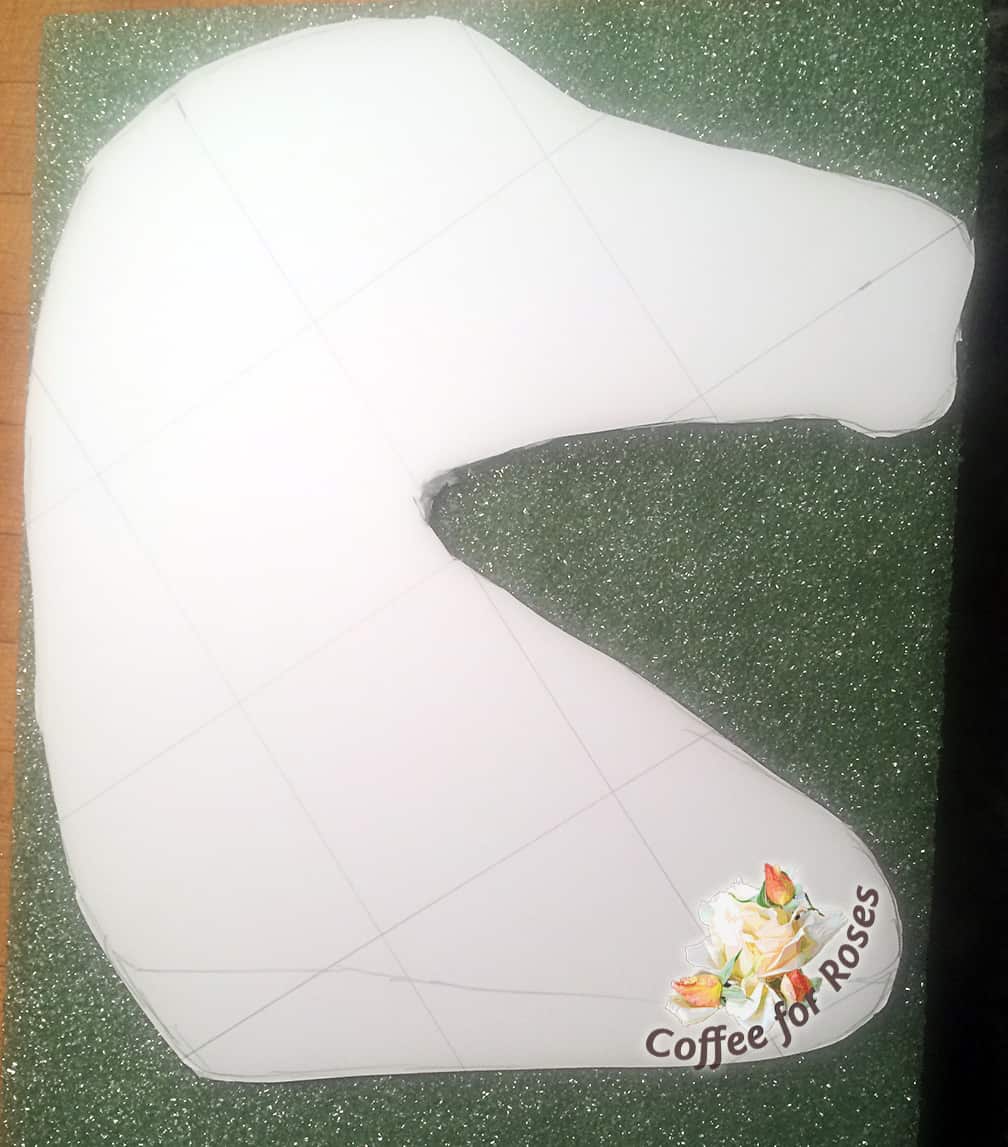
I cut out the foam core model so that I can use this from now on every time I make one of these pieces. When turned slightly it fit twice on the standard piece of styrofoam I bought at the craft store. (These are available at florist supply houses as well. They are 12″ wide, 24″ high and 2″ deep.) I used a Sharpie market to outline the head on the foam.
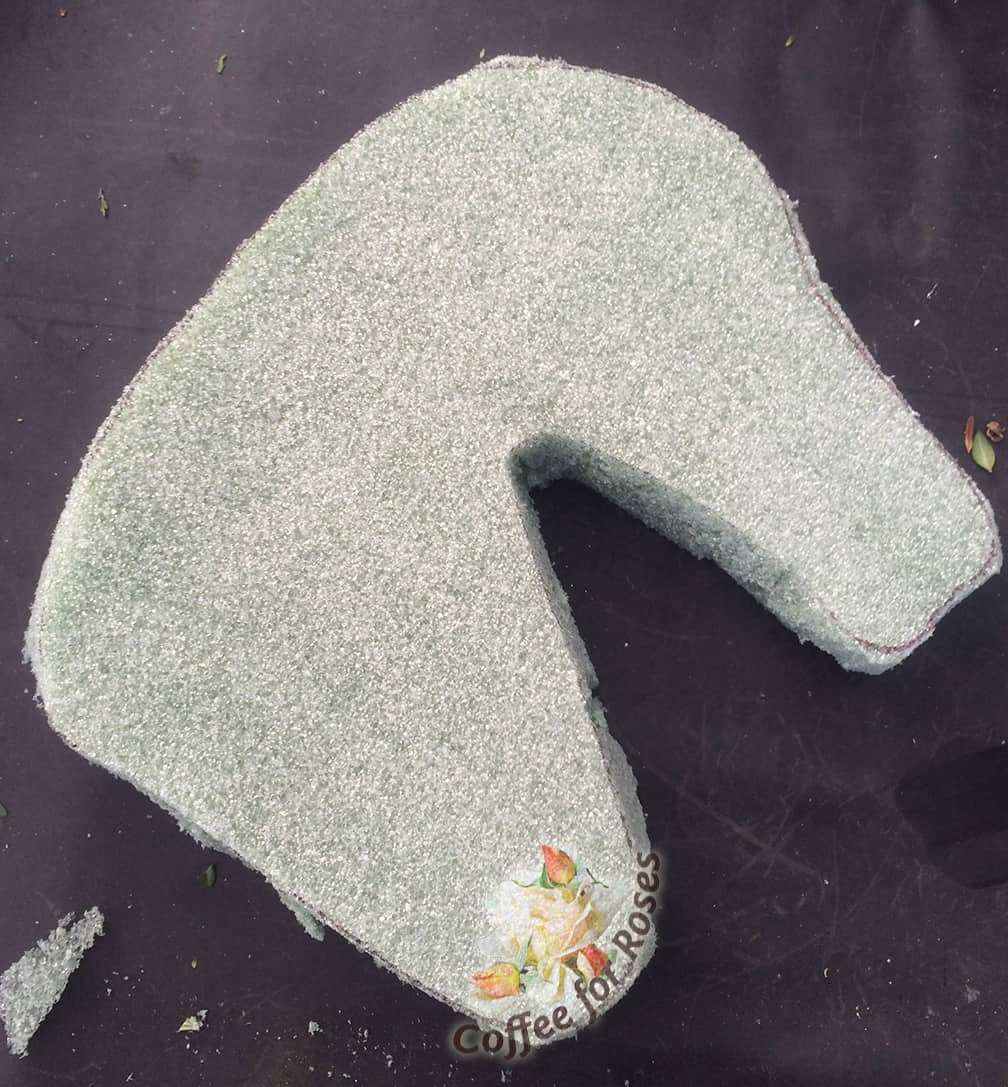
Here is how it looked after cutting around my outline using an old kitchen knife.
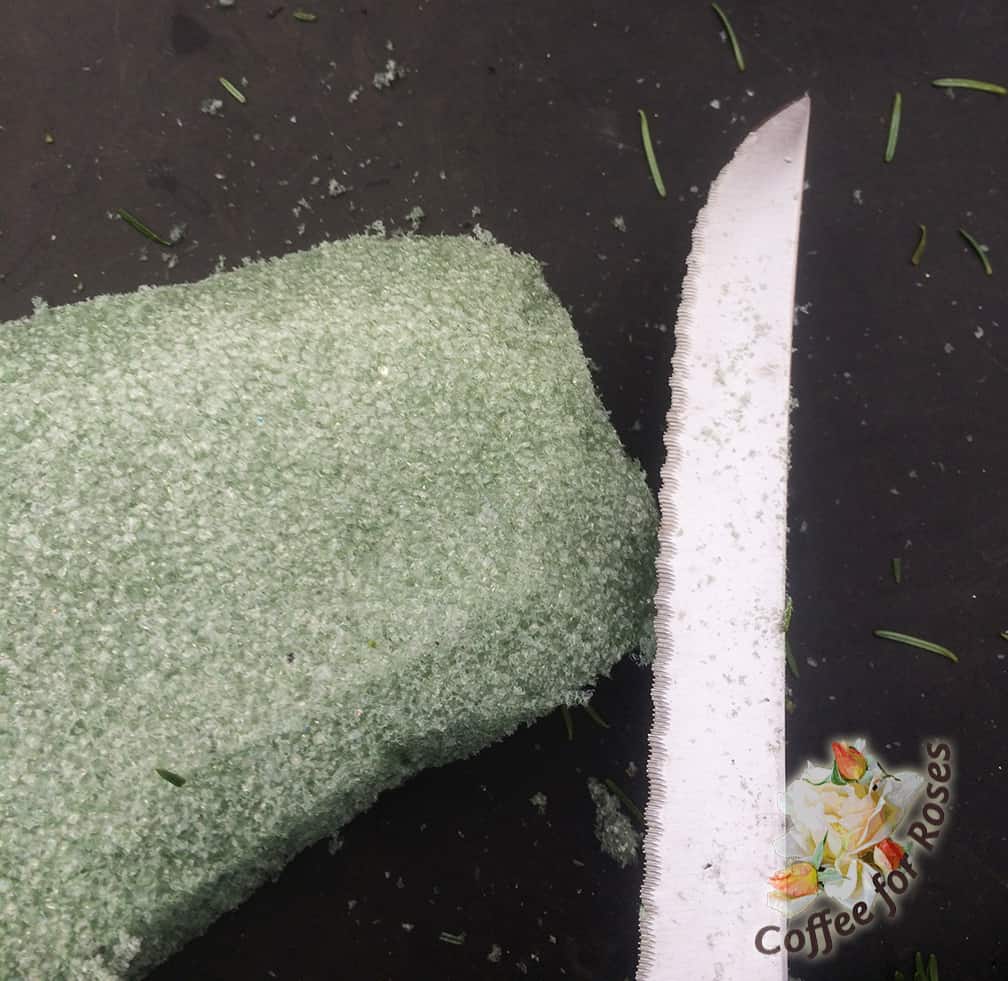
Since the nose needed to be just a bit thinner than the body, I beveled the edge of the face only, leaving the rest square.
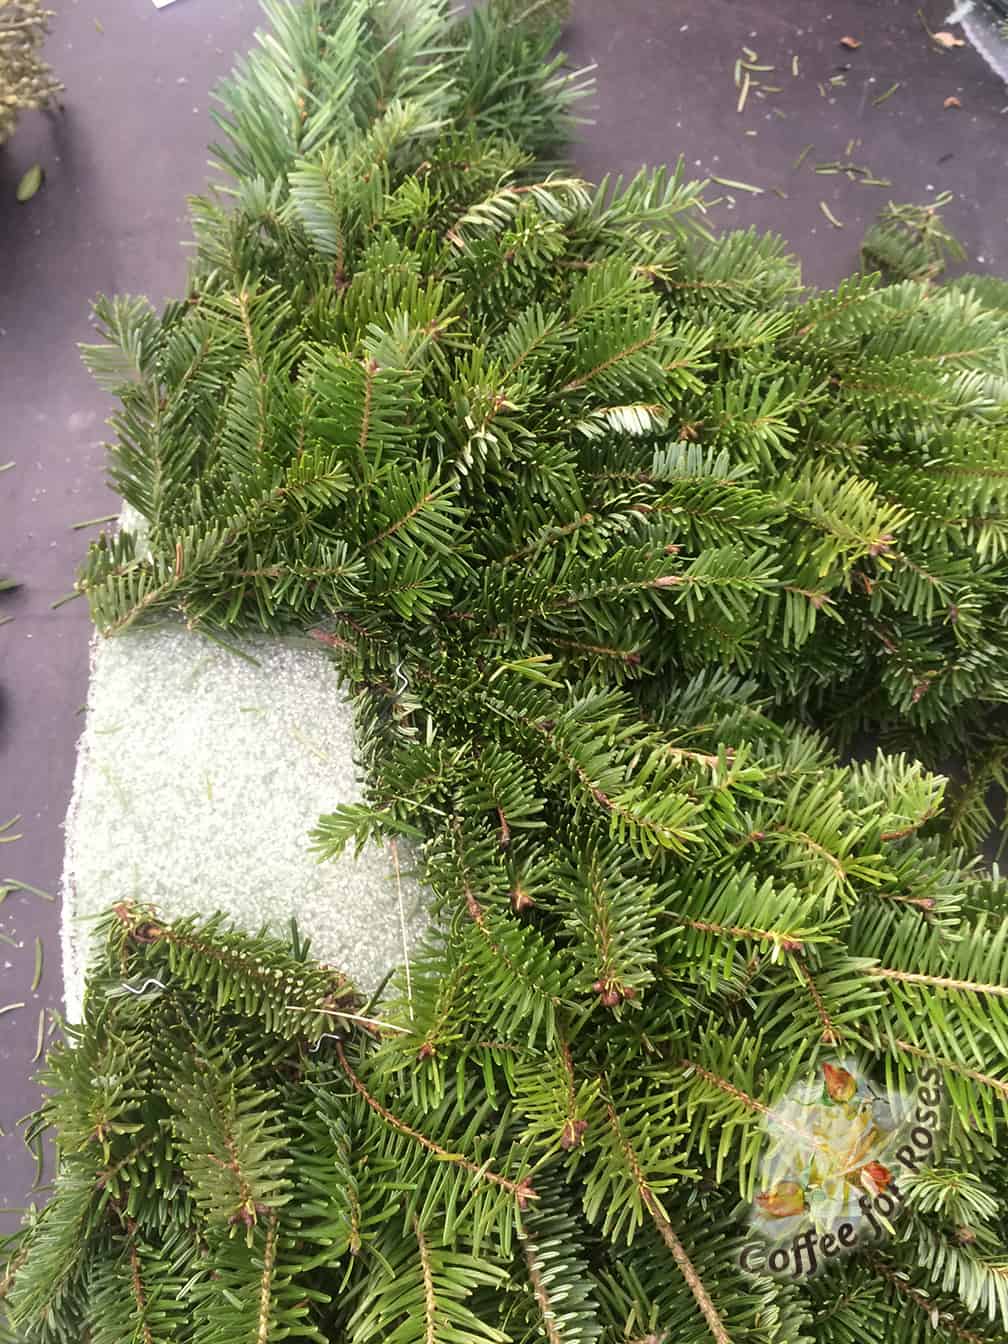
Note the wire that’s around the pony’s neck. This fastened in the back and has a look on it for hanging. Do this before you add any greens on the top and you’ll have a secure way to hang the finished piece. On the bottom I stuck some longer balsam branches right into the edge of the foam. This was only done on the bottom, however…for the rest of the balsam “fur” I cut balsam tips about 2 to 3 inches long and used fern pins to attach the pieces.
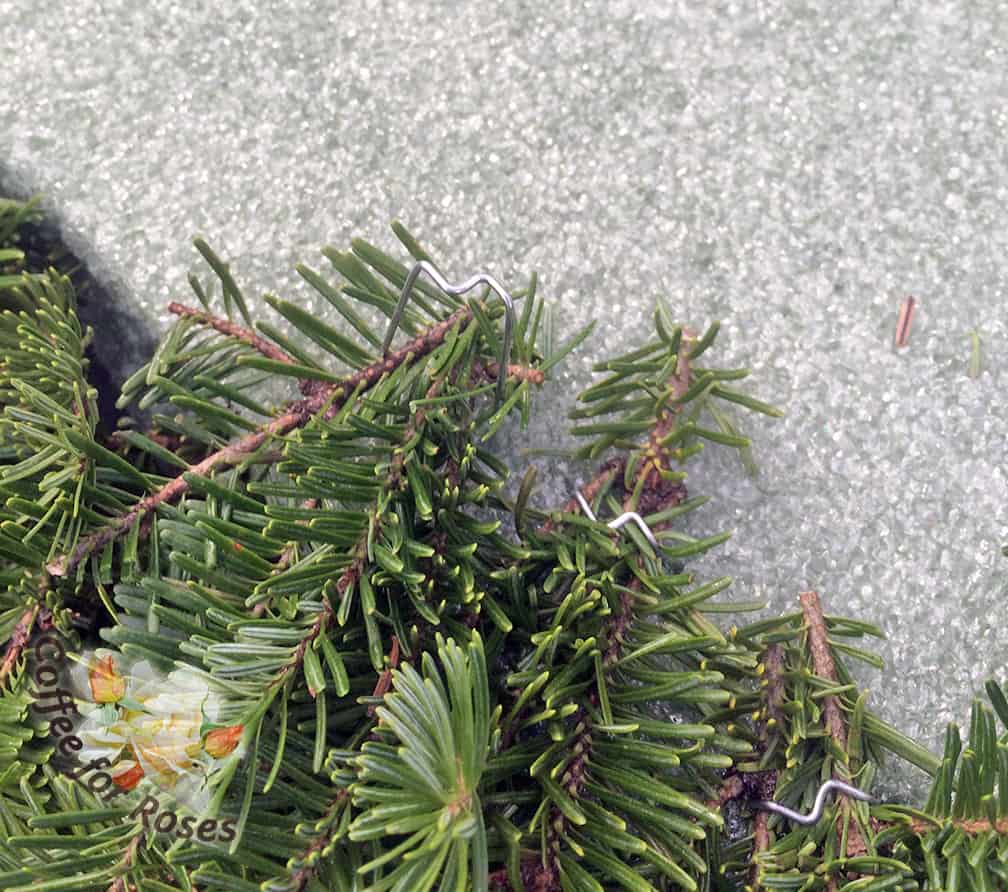
Next I started at the bottom, pinning groups of three balsam tips in with each fern pin. If you use tips that branch into two or three tips at the ends they will cover the foam and pins under them even better than a single piece would. Stick the fern pins into the foam at an angle so that the sharp points of the pins don’t come through the foam on the other side…otherwise you’re likely to get pricked when you pick it up or hang it. Fern pins are sold at garden centers such as mine, or florist supply and craft stores.
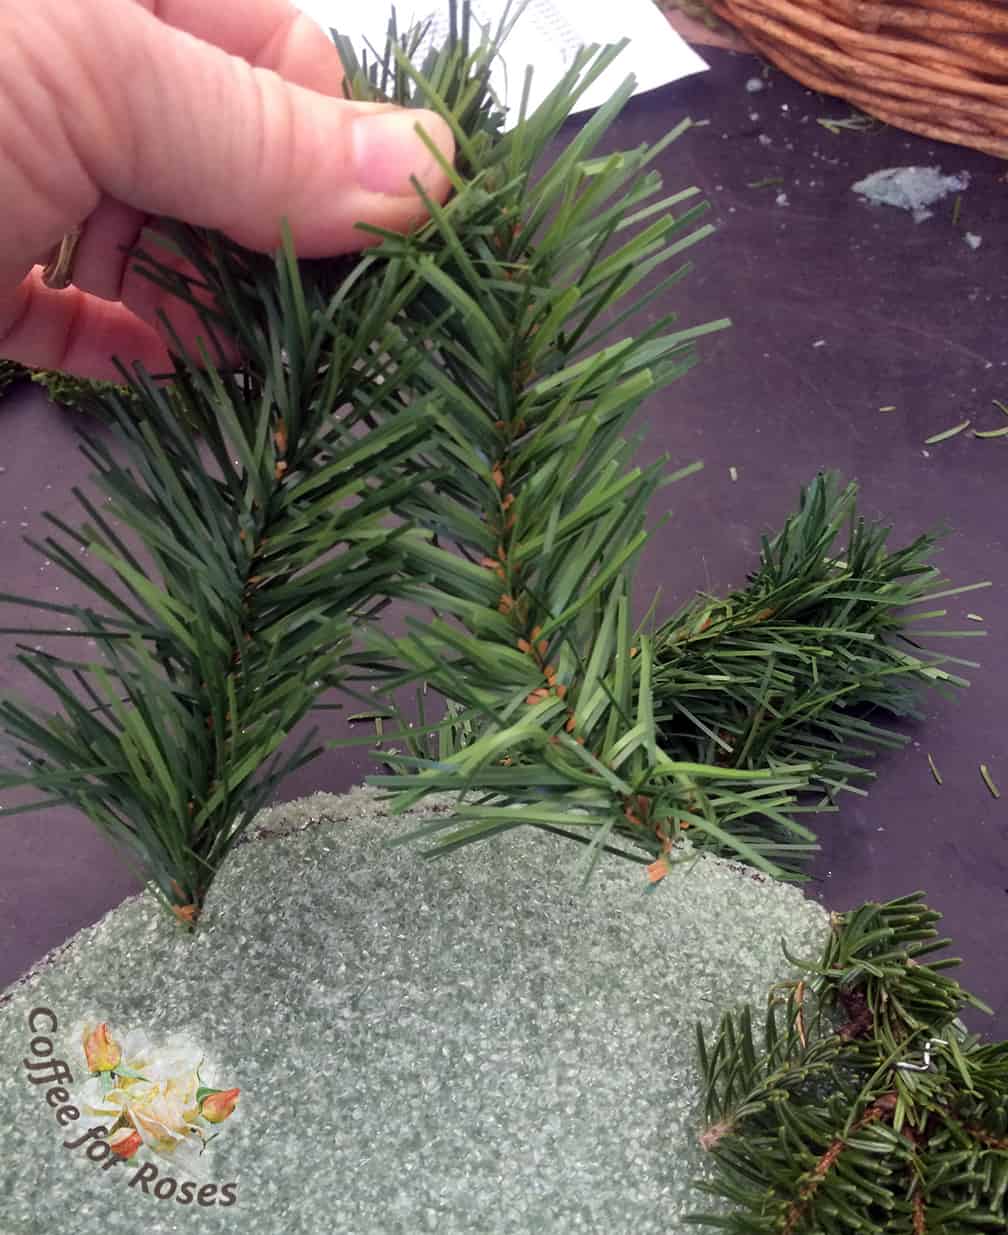
Use slightly shorter pieces of balsam for the nose to get a finer texture. Move from the bottom up, and from the end of the nose back toward the head, attaching bunches so that they overlap the pins on the layers below.
Move from the bottom up, attaching bunches of balsam tips so that they cover the pin tops on the layer below. Use slightly smaller or finer tips for the nose, and pin some on the edges first, working from the bottom of the nose up toward the head. Remember that you don’t have to cover the mane area with balsam, as that will get covered with groups of white pine or other long-needled evergreens.
I made each of the ears out of two pieces of artificial balsam garland. I fastened them together and bent them into an ear shape, sticking the wire ends right into the foam before putting the white pine in for the mane.
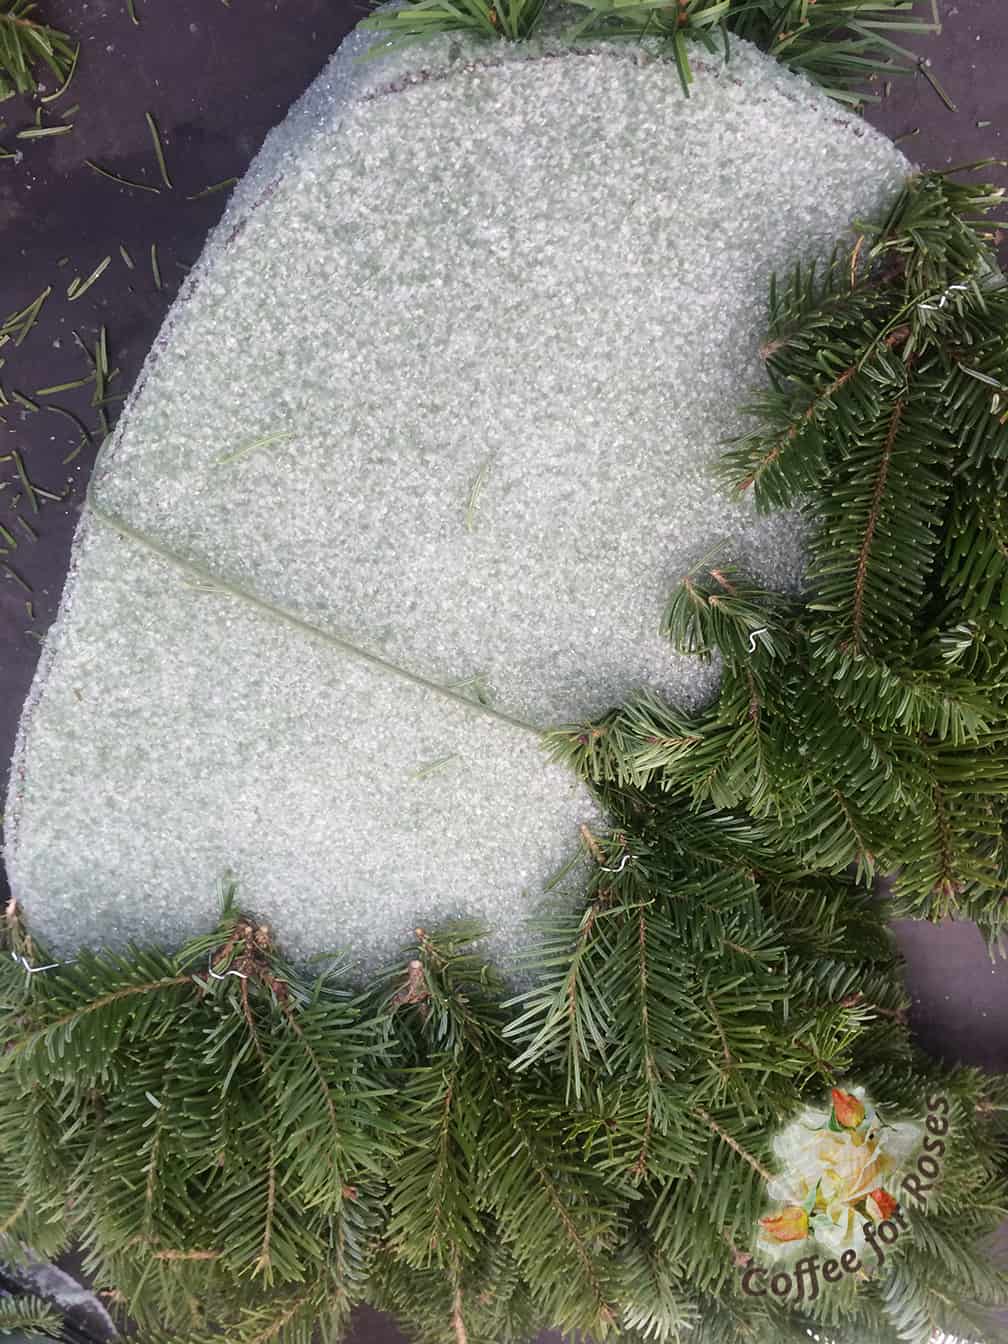
Here’s how it looked when I was almost done with the balsam but before I added the white pine mane.

One last tip…see how the head of one fern pin shows here? Yes, I could have gone in and added more balsam tips, but this was more easily hidden as you can see in the next photograph.

This is a shot of the same area – can you see the pin? If you look closely you can, but it’s not really noticeable because after I was done pinning in all the greens I took a small paint brush, and some black acrylic paints, and quickly painted the top of any fern pin that showed. When they are black they disappear.
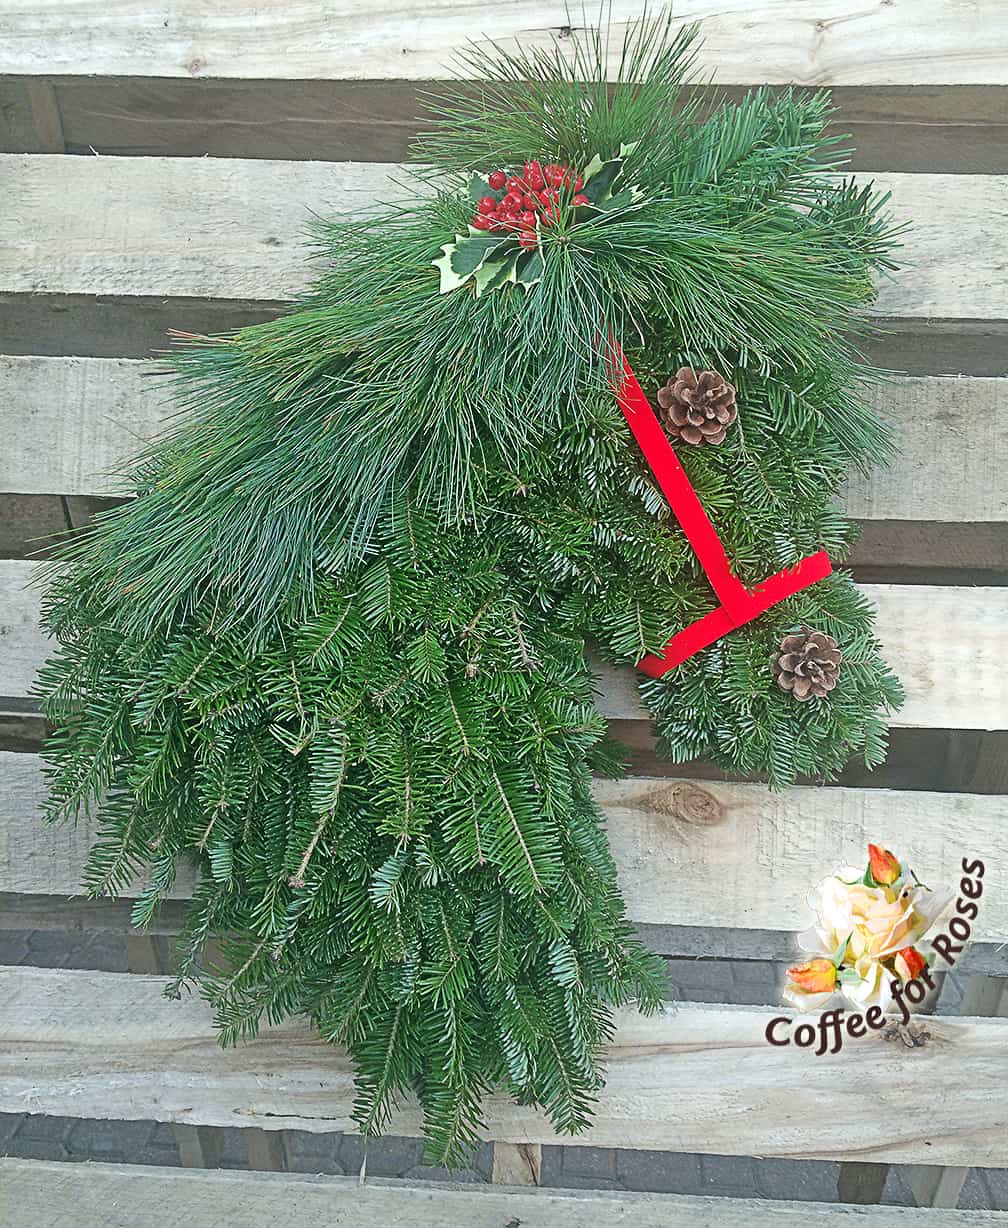
The long greens get pinned on the mane, and a ribbon halter is pinned around to the back. I used natural pine cones instead of red, and pinned a cluster of artificial variegated holly and berries for accent.
Maybe I’ll do a cat next; I’ve noticed on Facebook that there are lots of cat fanciers out there…


